
Fireworks are a magical experience at any Disney Park. The fireworks show at Disneyland dates back to Walt Disney, who wanted to leave guests with a “kiss goodnight,” a tradition that has continued to this day. But photographing the magic of fireworks isn’t easy. We have a few tips to help you capture Disneyland’s fire in the sky!
This article serves a dual purpose. Not only will it help you take beautiful photos of the nightly fireworks show, but it’s also a guide to finding the best spot to watch them.
Viewing Locations
At Disneyland, there are three main viewing locations for the fireworks show. Each one has varying difficulties and strategies.
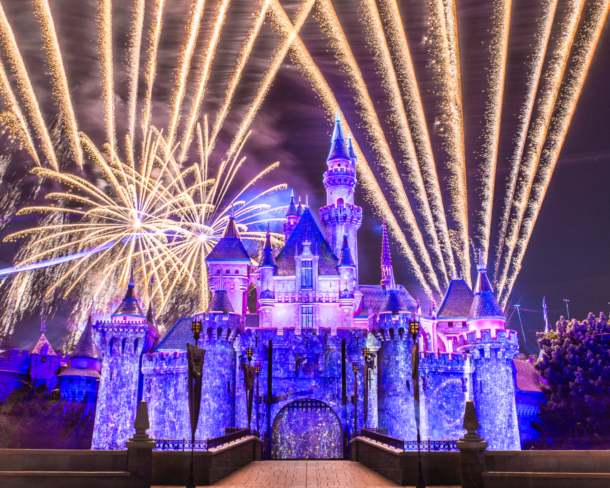
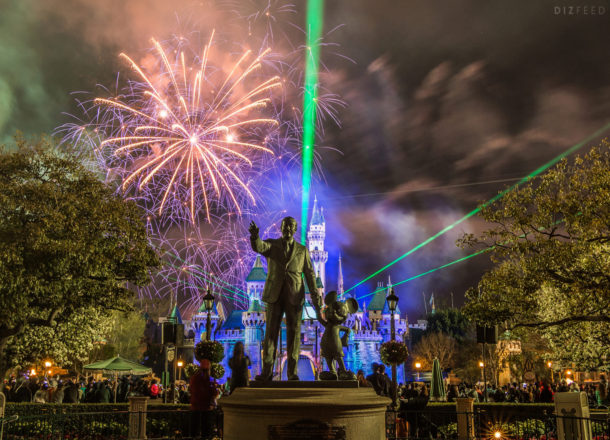
Castle Hub

The Castle Hub (or more commonly referred to as “The Hub”) is the circular area at the end of Main Street where you’ll find the Walt and Mickey statue. The only issue with this location is that you have to fight the craziest crowds.
There are three main sections of the Hub which provide spectacular photo opportunities. They are:
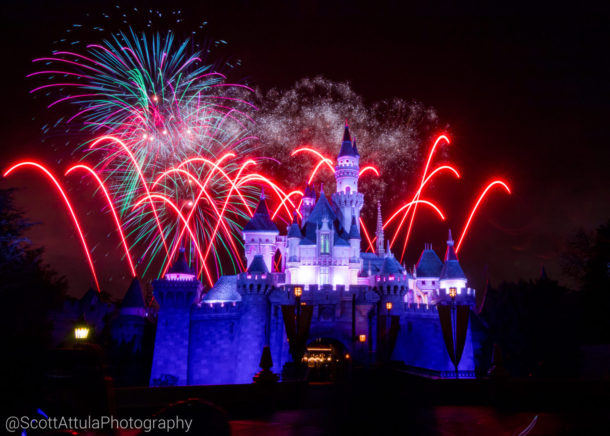
1. Hub: Castle Forecourt
Unfortunately, they started routing a walkway through this area now, so you can’t always get a completely unobstructed view of the castle, but you should have a mostly unobstructed view of the fireworks and most of the projections on the castle. If you’re shooting long exposures (which we’ll talk about more below), then the extra exposure time should help with blurring out some of the people walking in the walkway. This spot pretty much requires a wide-angle lens to properly compose the image, though.
2. Hub: Center
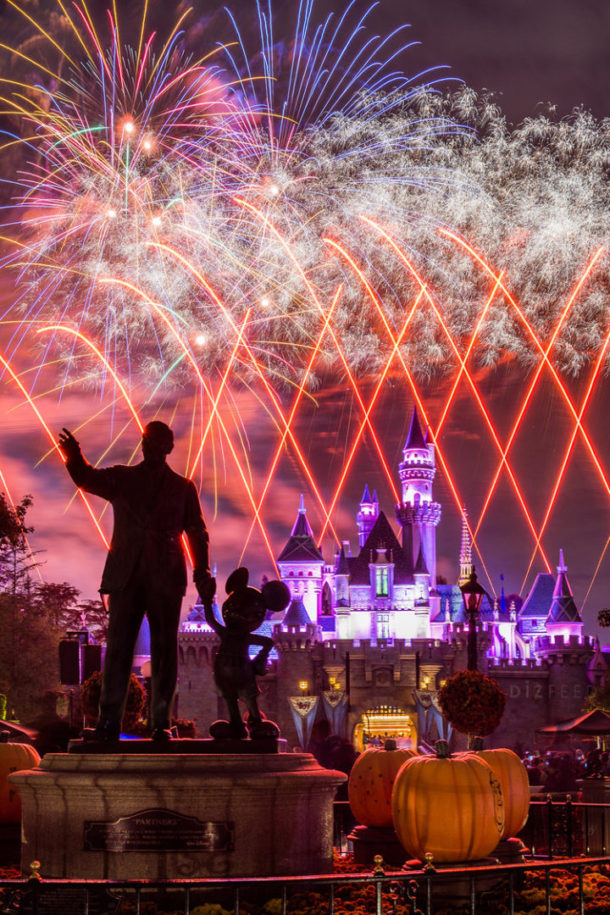
Right up against the Partner statue (the walkway around it). The walkway can be a problem, but just be creative with framing because there’s nothing like seeing Walt and Mickey poking up out of the foreground of your photo.
3. Hub: Side
The Tomorrowland side is the best. This isn’t my favorite spot since there’s a bunch of trees covering the castle, but it’s not a bad angle for the fireworks themselves.
Timing for the Hub
If you want to set up for a good spot in the Hub, you’re going to have to wait for it. If you time it right, you can set up at the Castle or Hub Center during the nighttime parade. There’s a very tiny window after the parade ends to get anywhere, though, so prepare early.
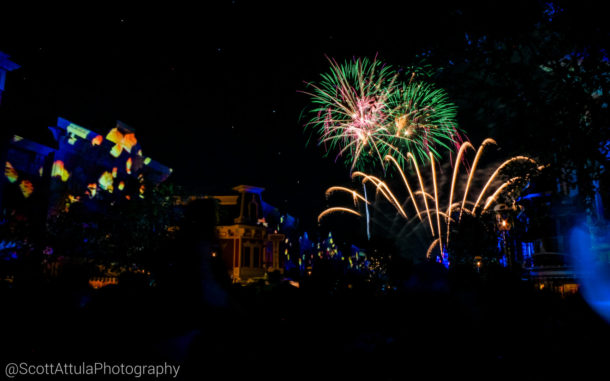
Main Street

Main Street is the stretch of street from Town Square to the Hub and is usually my preferred location to shoot fireworks from. It’s often less crowded because people want to get closer to the castle, but it’s tricky to get to, especially if you’re in the eastern part of the park. Try to be on the western part of the park, either in Frontierland or Adventureland, prior to the nighttime parade.
You can really set up anywhere on Main Street and have a great view of the fireworks show. Preferably, you want to be the closest to the castle as you can. In general, Main Street North (the little patch of Main Street past Coke Corner before the Hub) is always pretty packed. I prefer to start at the crosswalk at Center Street (the side street next to Carnation Cafe and Starbucks) and just work my way up until I have a decently unobstructed view down the street.
Unfortunately, Remember…Dreams Come True does not have projections on the Main Street buildings, only on the castle, Small World, and Matterhorn. Working with projections will be its own article later on.
Timing for Main Street
Main Street is as much a prime viewing spot for the nighttime parade as it is for fireworks viewing. When the parade passes by, the street becomes a fireworks viewing area. That’s what makes this location great, it doesn’t fill in early. The only issue is getting here, as the walkways from anywhere in the park can move very slowly during the nightly spectaculars.
Viewing Tip: No matter where you’re standing on Main Street, the best advice I can give you is to remember this rule “Always stay to the right.” The fireworks appear on the left side of the castle.
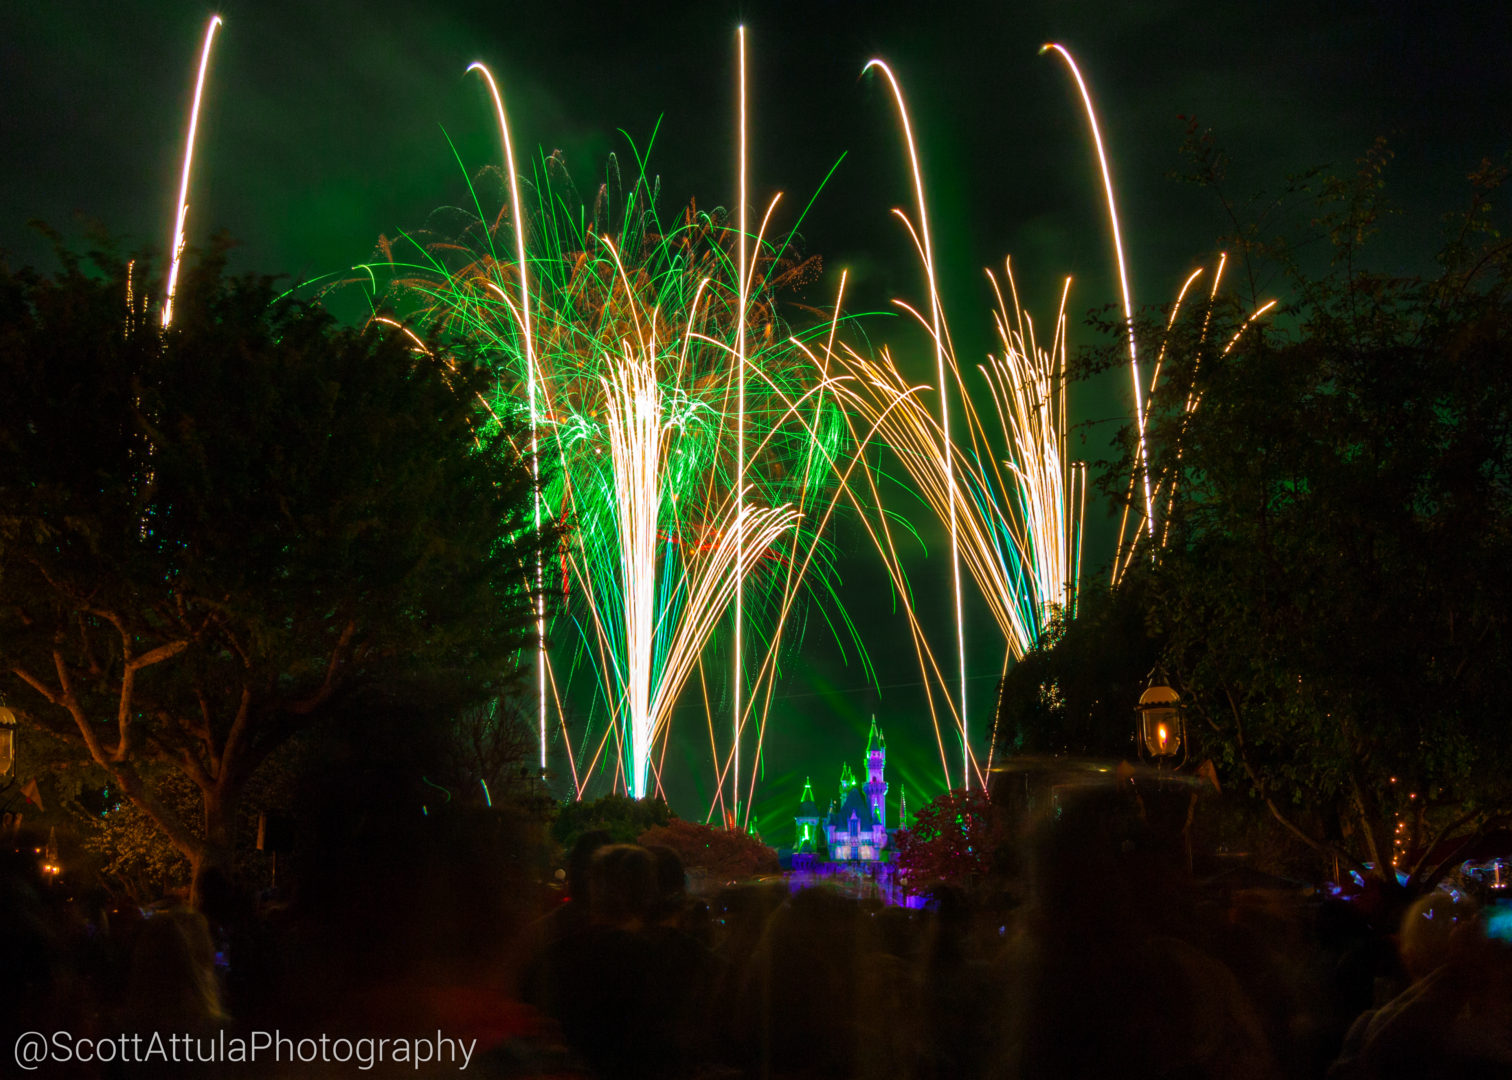
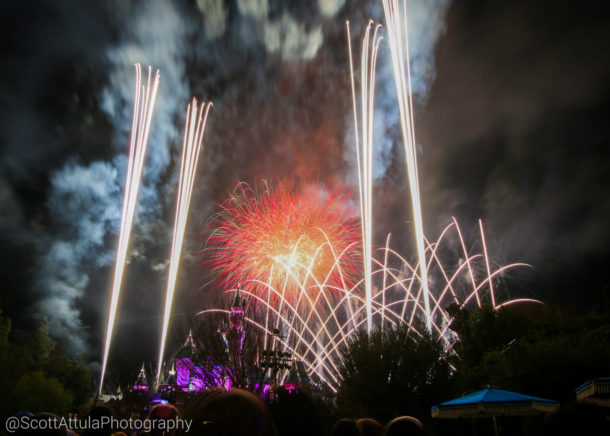
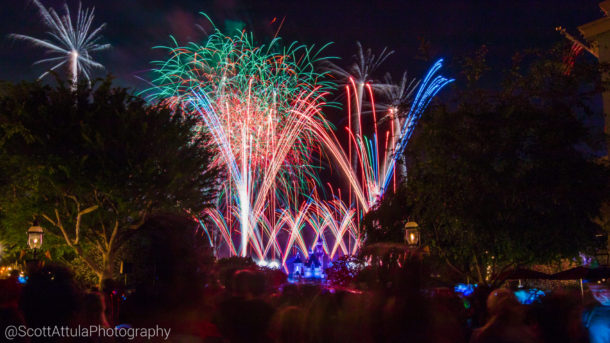
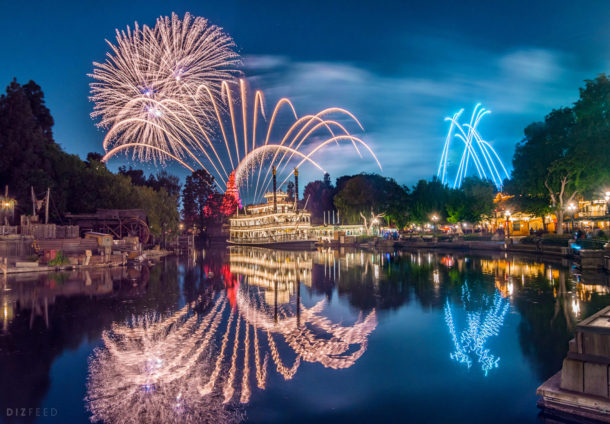
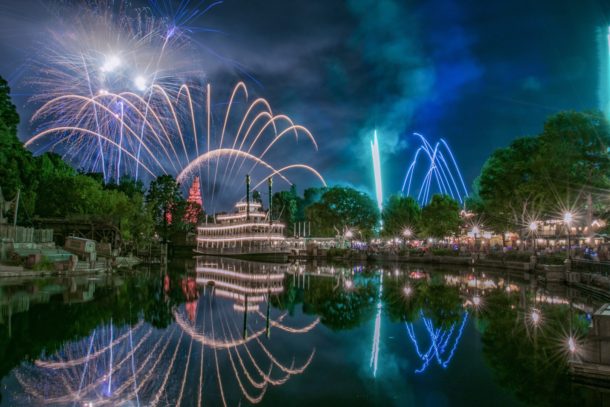
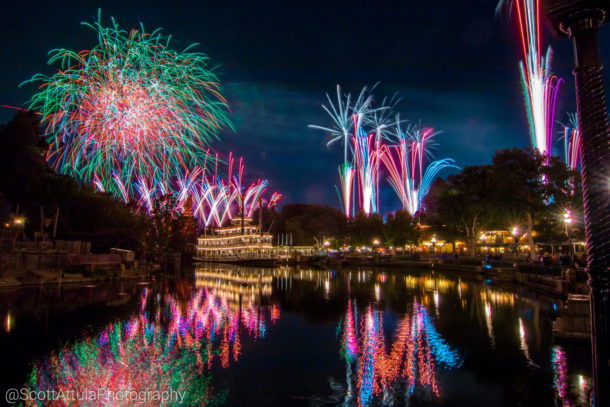
Rivers of America
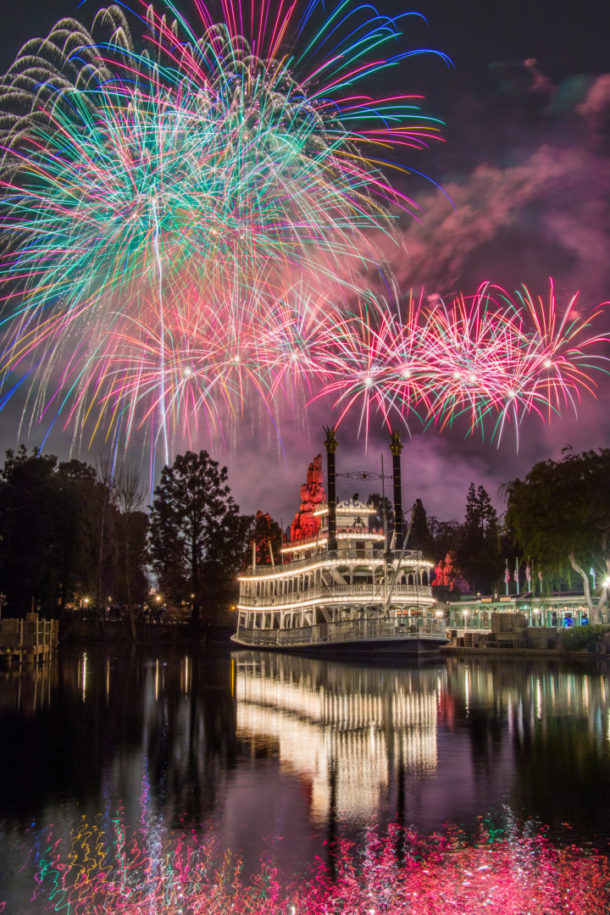
The waterfront in New Orleans Square is one of my favorite spots to shoot fireworks due to relatively lower crowds (especially during Fantasmic downtime). Even if Fantasmic is happening, you can arrive pretty close to the end of Fantasmic and get a decent spot.
Setting up anywhere on the waterfront will likely yield great results. Choose what you want to frame the fireworks with and go. I tend to move more to the left side of the waterfront so I can have a better angle on the Mark Twain and Fantasmic stage, but it’s not necessary.
Timing for Rivers of America
Timing for shooting in this location has a lot to do with if Fantasmic is running. If it’s not, then timing isn’t much of an issue. If Fantasmic is happening, a lot of people leave afterward, so just move quickly to claim a spot as close to the rivers edge as possible. It’s similar to moving in after a parade. You also have the option of just watching Fantasmic and then watching the fireworks right afterward. Even without a waterfront spot, it’s still a great location.
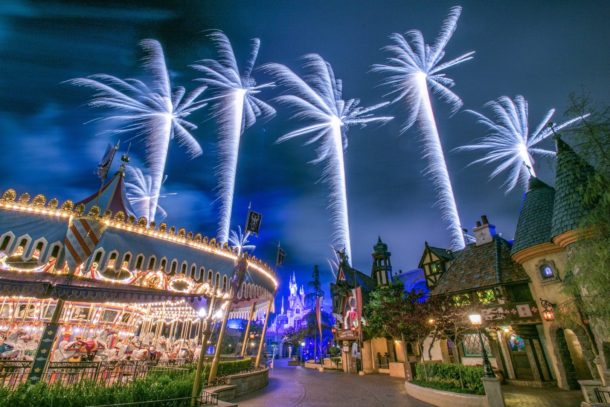
It’s a Small World
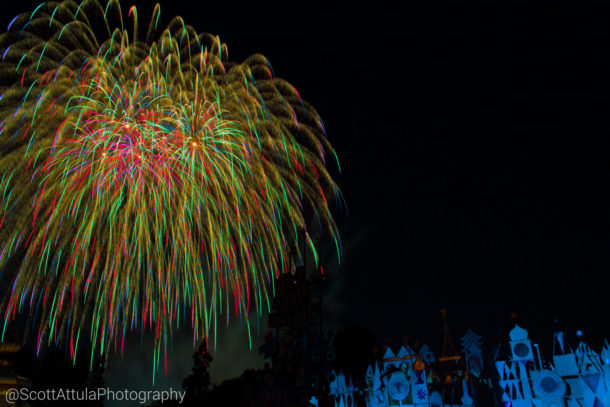
It’s a Small World is really close to the fireworks, so it’s a great spot to fill your entire camera frame. The only issue is that there’s a large VIP viewing area, so some of the best areas are roped off. Disney also ropes off the area to the right of the viewing area, and that’s where I used to set up my tripod.
My suggestions for shooting fireworks from Small World are to move the furthest to the right as you can and it basically requires a wide angle lens. If you’re lucky enough to go on a day without VIP, then you can get an even better spot!
Timing For Small World
Small World is all about the nighttime parade as well. If you arrive soon after the parade ends, you’re likely to find a decent spot.
Photographing Fireworks
Photographing fireworks can be tricky, as there are varying amounts of light happening at one time. The sky is dark, objects on the ground are only dimly lit, and then the fireworks are bright! The basic idea is to not blow out the highlights of the pyrotechnics.
Basic Photography

Assuming you don’t have a tripod and/or you’re just shooting with your phone, you can still get decent pictures. But you can’t get those beautiful streams of light like you can with long exposures.
Smartphones
Most people are going to photograph their vacation with their smartphones, that’s just how it is. I’d personally recommend shooting with a different camera, but smartphones are convenient and easy to use. But they don’t do well in low-light.
Not all smartphones are the same, but in general, they tend to operate in a similar fashion. Many people are probably going to have an iPhone, so exposure (and focus) on an iPhone is set by tapping somewhere on the screen. From there, you can adjust exposure slightly by swiping up or down on the screen, depending on if it needs more exposure or less. You’ll likely want less to keep the fireworks from being over-exposed.
I have an Android phone (Nexus 6) and I use Google Camera. It works similarly to the iPhone, but instead of just swiping, there’s an actual exposure bar at the top of the camera interface. Check how your app works before the show or use a different app.
Point and Shoots/handheld DSLR
With actual cameras, you can more easily control exposure. Point and shoots won’t do as well in low-light but if you keep the ISO low, it shouldn’t matter as much. For either, you’re probably going to want to be in manual mode (M on the mode dial). I’ll skip explanations of how each setting works this time, so try these exposure settings:
Aperture: The lowest possible. F/3.5 is common as the lowest.
The caveat for a higher aperture is a denser depth of field. This shouldn’t be much of an issue since your focus should be on the fireworks.
Shutter speed: Fireworks can be bright, so 1/100 should be a good setting; any lower and your photos might look shaky. Experiment with slightly lower shutter speeds if you can.
ISO: Auto-ISO should probably work in most cases, but you’re welcome to make it manual if you’re getting overexposed photos. Setting the exposure on the LCD screen can help.
The caveat for a higher ISO is higher digital noise, the grainy stuff that makes your pictures look like they were printed on old sandpaper. Shoot at the lowest ISO possible.
If you don’t feel comfortable with Manual Mode, switch to Shutter Priority (Tv on the mode dial), and just play with the shutter. 1/100 is probably just fine, and the camera takes care of the rest of the settings for you. You run the risk of the camera automatically overexposing though, so keep that in mind.
Framing
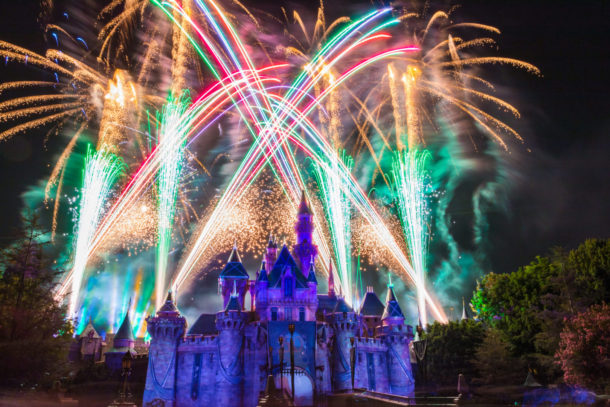
Here’s a crash course on composition. Always obey the “rule of thirds” if you can. Below, a visual representation of what that means.
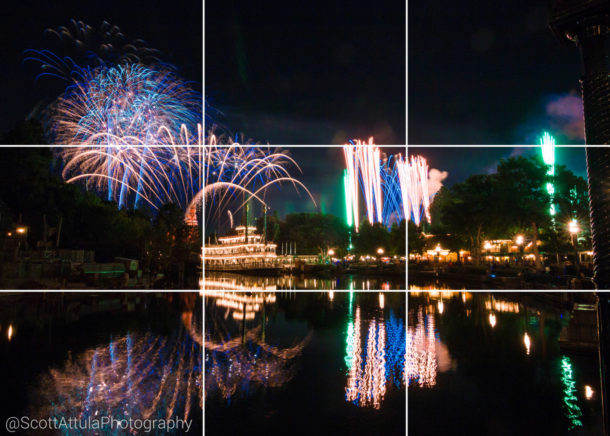
It’s a fairly simple technique to understand, and in many cases, you can actually get an overlay of this grid on your display. Basically, line your subject to either the left or right vertical line, preferably at one of the intersections of the vertical and horizontal lines. In my photo above, my subject is the main fireworks show, so I aligned it to the top left intersection.
You also want to shoot wide for a lot of scenes. Try to fit the whole firework in-frame and then you can crop the photo later on if you were a little overzealous.
Advanced Photography
Long Exposure
Long exposures of fireworks are what make the pyrotechnics look like beautiful streams of light, and is the preferred method for photographing fireworks. The only requirement is for the camera to be stable on a tripod or other stable surface (I use either my Manfrotto Compact Action tripod or my Joby Gorillapod). Here are some basic settings to get you started:
Aperture: Set this low. F/9.0 or above should be good depending on how long your exposures are. F/13 is my sweet spot.
Shutter speed: Set this to 13″ or 15″. The exposure will last about thirteen or fifteen seconds.
ISO: Keep at ISO 100. Lower is better, as higher values will blow out the highlights.
If you don’t have a remote, set the camera to a 2-second timer to avoid vibrations from your hand as you press the shutter button.
Manual Focus
A smart option for shooting fireworks is to set your focus once and then flip to manual focus (most lenses have a switch on the lens to do this). This prevents any future photos from getting out of focus.
Timing
Timing is a bit difficult when you’re just taking fifteen seconds exposures. Try to time around the start new sections in the show.
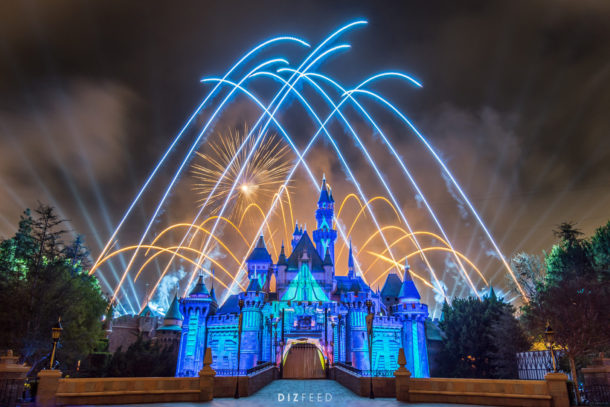
Remote Shutter and Bulb Mode

In Bulb mode (B on the mode dial), you choose how long the exposure is, it doesn’t have to be a set thirteen or fifteen seconds. This gives you a bit more control over the exact things you want in your photo. For example, the timing of sections of fireworks varies so you might want a sixteen-second or a twelve and a half second exposure.
First, you want to set your aperture accordingly depending on how long you expect your exposure to be. I was talking with Brandon (@Dizfeed), and he only works in Bulb mode for fireworks. He chooses sections of the show to hold the shutter for and picks between three different apertures to compensate. He generally sets base exposure to ISO 100 f/11 and either drops it to f/16 for brighter/longer portions or brings it up to f/8 for less bright/shorter portions. Many of his photos end up being around thirteen to fifteen seconds.
Remote Shutter Options
Remote shutter keeps your bulb mode long exposures from being shaky due to your hand creating vibrations. Here are a couple options to do this:
A physical remote: You can purchase remotes that hook up to the camera wirelessly (or wired if that’s better for you). You just hold down the shutter button as long as you want your exposure to be. It’s a potentially cheap option and it’s foolproof.
If you’re looking for a cheap and simple remote, the Amazon Basics one is less than $10 and has a Canon and Nikon version. Otherwise, check the remote controls section and choose one that works for your camera.
Smartphone App: Most modern cameras have WiFi built in that can be used to connect to smartphones and wirelessly control the camera. I have a Canon 70D and use Canon Camera Connect; it’s one touch of the shutter button and it will continue to hold the shutter open until I press the button again.
If you don’t have WiFi on your model, there’s also an option of hooking up to the camera with a USB cable. I did this with my Canon T3i, but It required me to have an OTG cable, and a standard USB mini-B cable. You’re tethered to the camera, though, so be cautious. The cables required would end up being about $10 to purchase, though, so it might be worth just getting a remote instead.
Touchscreen
Another option is to use the touch shutter. This requires a touchscreen obviously, but it’s as simple as tapping on the area you want in focus, and the camera will focus, then take the picture. In bulb mode, there’s a timer that pops up on the LCD screen that tells you how long your exposure is and you can end the exposure by tapping the screen again. Be careful, though, as the tap at the end of the exposure can cause vibrations.
Timing
Timing is easier with a remote shutter, as you can pick precisely how long you want your shutter to stay open. Learn the timing of the fireworks and pick a section, then correct your settings for it. Anywhere between thirteen to fifteen seconds is still the easiest to work with.
ND filters
Neutral Density filters (and polarizers) can be great tools for shooting fireworks. When you put on an ND filter (or a polarizer), you’re stopping the camera’s exposure settings down and also slowing down light as it enters the filter. I recommend between 2-4 stop filters (Sometimes called ND .6 and 1.2). Polarizers are great if you’re shooting at the Rivers of America, as you can increase or decrease the reflections of the fireworks and Mark Twain on the river, and they work as 2-stop filters.
ND Filters have a tendency to make surrounding objects darker than they would be, even with exposure compensation, so take care to note that. You can fix it slightly in post, or Brandon (@Dizfeed) suggested letting the exposure go a few seconds before or after a section of fireworks if there’s “dead” space between where fireworks aren’t going off.
ND Filter Exposure Compensation
If you’re using an ND filter that means you need to change your long exposure settings. Exposure stopping is all about math, so it’s a bit more confusing. Which setting to change depends on whether you’re using the ND filter to allow you to shoot longer exposures or if you’re just looking for the ND “effect.”
Settings Compensation explanations
One stop of compensation with shutter speed is either multiplying or dividing the shutter speed by 2 (if you’re in seconds, fractions of a second are different). For example, if you’re shooting with a 2-stop filter at fifteen seconds, you need to divide fifteen by four.
I don’t recommend compensation with ISO as it’ll introduce digital noise into the photo, but ISO is the same as shutter speed, just multiply or divide the ISO by 2.
I’d rather not explain stopping in aperture, as it requires a lot of math, so I’ll just give you the scale: f/1.4, f/2, f/2.8, f/4, f/5.6, f/8, f/11, f/16, f/22. Each aperture setting on that scale is one stop away from each other. So if you’re shooting at f/16 with a 2-stop filter, you should go down to f/8.
Longer Exposures
If you’re shooting for longer exposures, you need to turn up your aperture and turn down the shutter speed. If you’re going from fifteen to thirty seconds, that’s one stop of exposure down. If you’re using a 2-stop filter, you now need to stop down three times. So you can turn the aperture down three times from f/11 to f/4, or maybe turn the aperture down twice and ISO up once.
Just Compensation
If you’re just looking for the ND filter “effect”, just compensate with aperture. If you’re at f/11 and using a 2-stop filter, just go down to f/5.6.
Here’s Brandon’s (@Dizfeed) real-world usage. He sets base exposure at ISO 100 f/8 and either drops it to f/16 or more for brighter/longer portions or brings it up to f/6 for less bright/shorter portions. He’s still exposing for about thirteen to fifteen seconds, but he’s got a variable filter set around 4-5 stops he’s compensating for.
Editing Fireworks Photos
Make sure you’re shooting in RAW, of course. I’m not going to go too in-depth for this because fireworks photos only need minor adjustments. Here are some suggestions for editing fireworks:
White Balance
White balance likely won’t need to be changed too much, adjust the temperature to your liking.
Tone
Exposure: Increase this just a little bit to bring back your shadows. Don’t go overboard and blow out your highlights too much or introduce a lot of grain.
Contrast: You’ll likely want lots of contrast to mask the shadows out and make the fireworks stand out more.
Highlights: Adjust highlights down until the fireworks look correct. Be careful not to adjust too much or the white portions will look gray, you want them to be white.
Shadows: Adjust to your liking, but be careful with the noise in the shadows.
Whites: This can help adjust the whites in the highlights slightly, but if you adjusted highlights properly it’s not as important.
Blacks: Bring blacks down a bit to bring more focus to your fireworks.
Clarity: I’d suggest not touching this. It’ll likely only bring texture to noise, nothing more.
Vibrance and Saturation: I adjust +10 on both and come back after working with HSL. Most of the time they won’t need further adjustment. Just be careful not to oversaturate, but at the same time make the fireworks look colorful and pretty.
Hue, Saturation, Luminance (HSL)
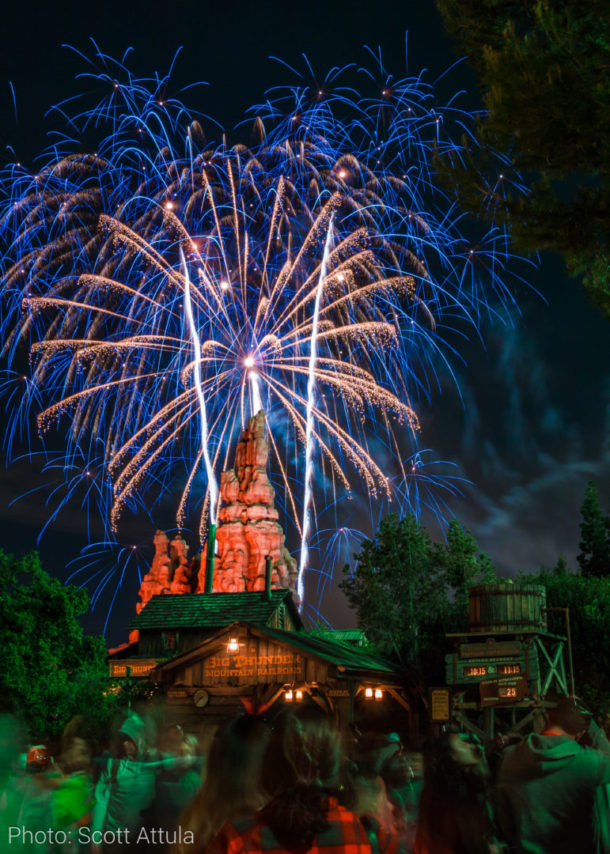
Hue: I find that the main adjustments here are if the reds in the image are too red. Big Thunder Mountain in many RoA photos comes out red instead of orange most of the time.
Saturation: Don’t oversaturate.
Luminance: Fireworks are bright, so adjust this for which color of fireworks are too bright.
Lens Corrections

Use lens corrections to fix the lens distortion and “flatten” the image. Should be as simple as clicking on “remove chromatic aberrations” and “enable profile corrections” if you’re shooting in RAW. Go ahead and slide the “Vignetting” slider down to “0” in most cases, as you’ll just be fixing vignetting on darkness.
I hope I’ve given you some good ideas on where you want to stand to take your fireworks photos and what settings to use when you take them! It can be a lot of work, but the reward is oh so sweet! I’ll be covering some more photography tips soon.
If you enjoyed the photos in this article, make sure to follow @Dizfeed, @Disneylandpanda, @Disneyland_over_everything, @Disneydentist, @MiceChat and me (@ScottAttulaPhotography) on Instagram! Thanks to my friends who contributed again to this column, it really adds to the articles!
All the Amazon links in this post help support this column,so feel free to do your everyday shopping with them.
You must be logged in to post a comment.